What is Event Propagation & Event Delegation in JavaScript?
What are Events in Javascript?
Let’s just revise our basics and talk about events first. Events are actions that happen in the browser — we can detect and react to them using our JavaScript code. Events like click or mouseover are a few examples of events that occur inside the browser.
What is Event Propagation?
Event propagation is how an event flows through the DOM. The Document Object Model (DOM) is a tree of nodes, where HTML elements are nested hierarchically with the root element at the top and the nested parent-child elements below.
Consider a click event on a button inside a div element. Instead of stopping at the button element, the click event propagates through the parent div, then the body element, and finally reaches the root element of the document. In essence, the click event that occurred on the button travels through the nested DOM and triggers the click events of the button’s parent elements as well.
<section id="section">
  <div id="div">
    <button id="button">Click Me</button>
  </div>
</section>
const button = document.getElementById('button');
const div = document.getElementById('div');
const section = document.getElementById('section');
button.addEventListener('click', (e) => {
console.log(`eventPhase: ${e.eventPhase} | target: button`);
});
div.addEventListener('click', (e) => {
console.log(`eventPhase: ${e.eventPhase} | target: div`);
});
section.addEventListener('click', (e) => {
console.log(`eventPhase: ${e.eventPhase} | target: section`);
});You can see that even though we only clicked the button element, a click event was triggered for the button’s parent elements as well. You might also notice the hierarchical path of the event: it started from the nested button element, traveled to its parent div, then to the section, and finally up to the root HTML element.
Although the DOM is a tree structure and events move up and down the tree, for a simple visualization, think of it as the event literally falling through the target element until it reaches the root.
Now that we know events travel through the DOM, we can explore the different stages of event propagation.
Event Bubbling
In this stage, the event travels from the nested element where the event was triggered up to the root element of the document. This is the default phase used by most browsers today and is denoted by the eventPhase code of 3.
A simple analogy to visualize event bubbling: think of the DOM as an ocean, with the root element as the ocean surface and the nested elements as the different layers beneath it. Imagine an event triggered at a button deep under the ocean — this event is like a bubble created at the bottom, rising to the surface and passing through all the layers along the way.
Target Phase
This is the stage where the event has reached the target element itself — the element that actually received the event. This phase is denoted by the eventPhase code of 2.
Capturing Phase
In this stage, the event starts from the root of the document and travels down to the nested target element — the opposite of the bubbling phase. This phase is denoted by the eventPhase code of 1.
To observe event propagation in capturing mode, addEventListener accepts a third parameter where we can pass { capture: true } (or simply true). By default this is false, meaning bubbling is used.
button.addEventListener('click', (e) => {
  console.log(`eventPhase: ${e.eventPhase} | target: button`);
}, true);

div.addEventListener('click', (e) => {
  console.log(`eventPhase: ${e.eventPhase} | target: div`);
}, true);

section.addEventListener('click', (e) => {
  console.log(`eventPhase: ${e.eventPhase} | target: section`);
}, true);
Notice how this time the event propagation began from the root element and made its way down to the nested element — the opposite of bubbling.
What is Event Delegation?
Now that we know what event propagation is and its different phases, we can delve into event delegation and how it can make life easier — or at least for the browser.
Event delegation is a technique that leverages event bubbling and capturing to work efficiently with event listeners.
The Problem
Your application has a table of documents where each row shows action buttons — delete, edit, and view. The table can contain up to fifty rows per page and is dynamic, meaning rows can be swapped in and out of the DOM asynchronously via AJAX. We want to console.log the action name whenever a button is clicked.
<table class="table-container">
  <tr>
    <td>Document 1</td>
    <td>
      <button class="action-btn" data-action="view">View</button>
      <button class="action-btn" data-action="edit">Edit</button>
      <button class="action-btn" data-action="delete">Delete</button>
    </td>
  </tr>
  <tr>
    <td>Document 2</td>
    <td>
      <button class="action-btn" data-action="view">View</button>
      <button class="action-btn" data-action="edit">Edit</button>
      <button class="action-btn" data-action="delete">Delete</button>
    </td>
  </tr>
  <!-- ...up to 50 rows -->
</table>
A beginner-friendly approach would be to loop through all the buttons and attach individual event listeners:
const buttons = document.querySelectorAll('.action-btn');

buttons.forEach(button => {
  button.addEventListener('click', (e) => {
    console.log(e.target.dataset.action);
  });
});
This code works, but it has two problems:
- Memory overhead — managing fifty or more event listeners consumes more memory and can slow down the page.
- Dynamic data breaks it — the script attaches listeners only at initial render. Any row inserted dynamically later won’t have listeners attached.
The Solution
Since all events bubble up to the root, we can attach a single event listener to the parent container instead of each individual button:
const tableContainer = document.querySelector('.table-container');

tableContainer.addEventListener('click', (e) => {
  if (e.target.classList.contains('action-btn')) {
    console.log(e.target.dataset.action);
  }
});
This code works perfectly and solves both problems:
- A single event listener replaces dozens, keeping memory usage minimal.
- Because we’re listening on the parent container, any dynamically inserted child rows are automatically covered — we always have access to the newest child nodes on demand.
Conclusion
This sums up our journey to understanding event propagation and event delegation. The key takeaways:
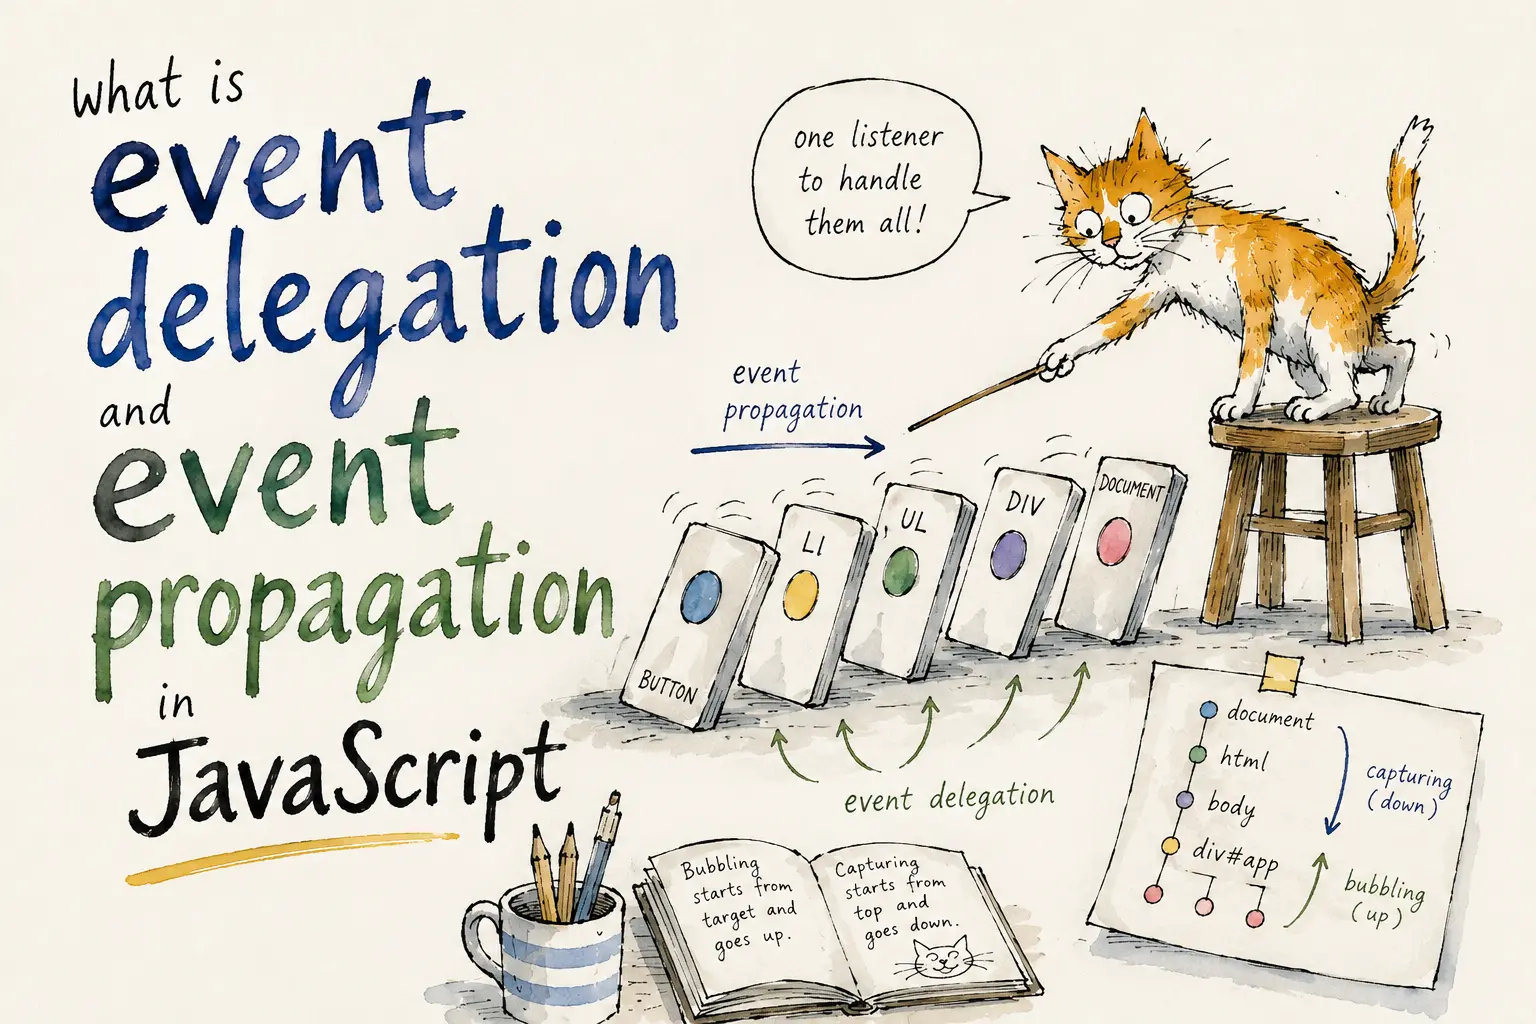
- Bubbling (default) — event travels from target up to the root.
- Capturing — event travels from root down to the target (opt-in via
{ capture: true }). - Event delegation — attach one listener to a parent instead of many listeners to each child, solving both performance and dynamic-data challenges.
I hope you enjoyed this article and found it informative. Thanks! 🙂